Centre-

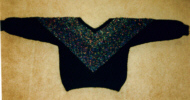
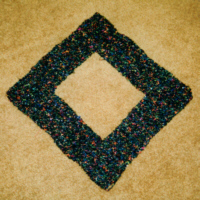
I had a small amount of black and multi-
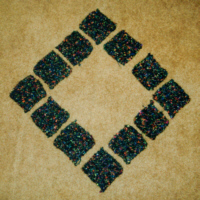
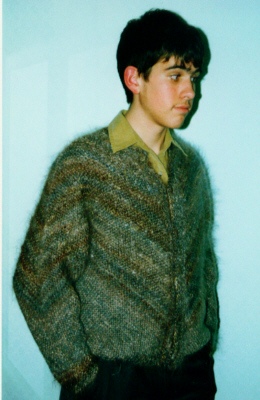
I divided the sparkly yarn into twelve equal amounts and knitted the 12 squares to the largest possible size.
With a larger amount of yarn you could start with 8 squares instead of 12.
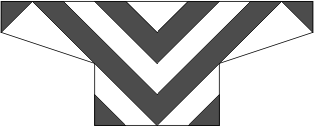
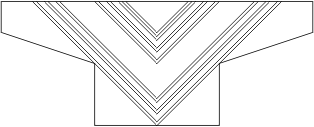
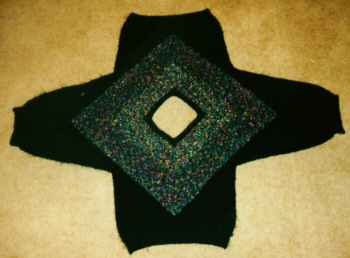
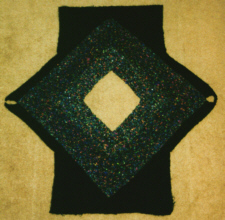
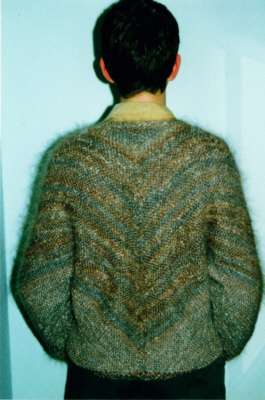
The squares were stitched together into a square making V shapes to point down the back, front and both sleeves.
I divided the matching yarn into four equal balls and used one on each side of the square until the yarn ran out.
If you do not want to stitch these pieces together, create each increase on one section by picking up a stitch from the previous section.
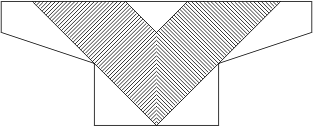
I continued in black, separating the sleeve sections where necessary.
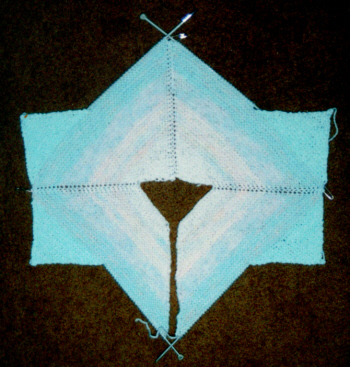
For the rest of the sleeves the pieces can be worked back and forth, until the full length is achieved. This leaves small triangles to be completed at the bottom and eliminates the need for further stitching.
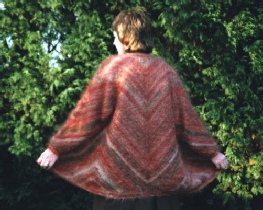
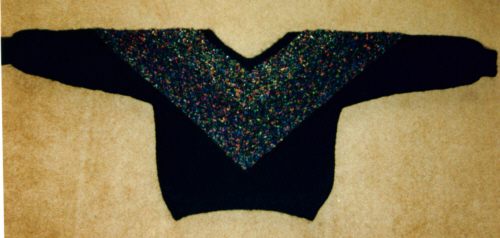
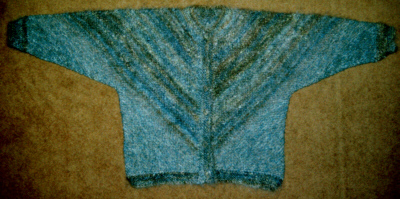
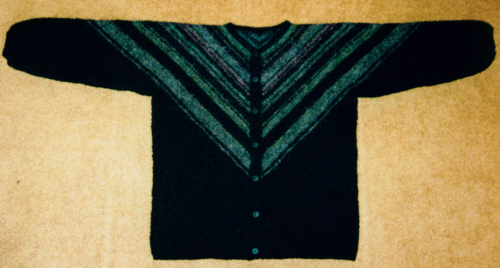
The completed sweater, with bands added and the neckline filled in with black.
Depending on the size of the resulting hole for the neck, other yarns can be added inside the square. I had a fairly small hole so only a small band was needed.
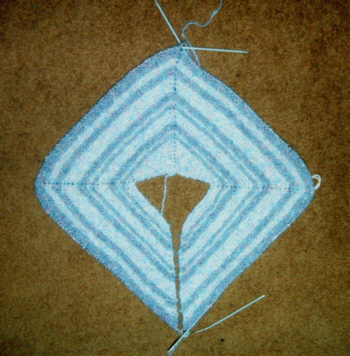
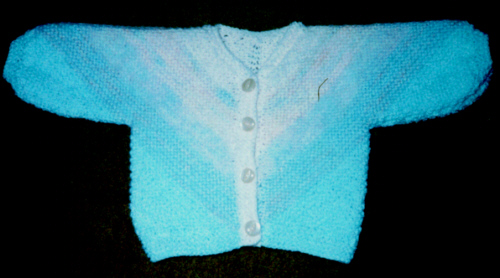
This shape was started at the centre back neck and a small triangle was knitted until it was wide enough to form the back neck.
The same number of stitches as there were on each side of the triangle were then cast on for the fronts and the knitting continued back and forth until the dividing point for the sleeves was reached.
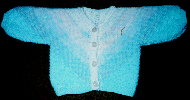
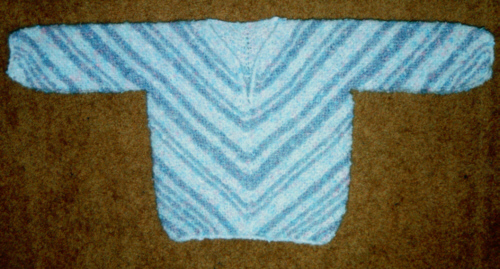
Oddments of baby yarn were used and the increases were made with yarn-
This is a tiny jacket. The needles seen in the photo are short needles intended for children.
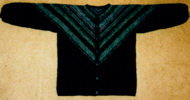
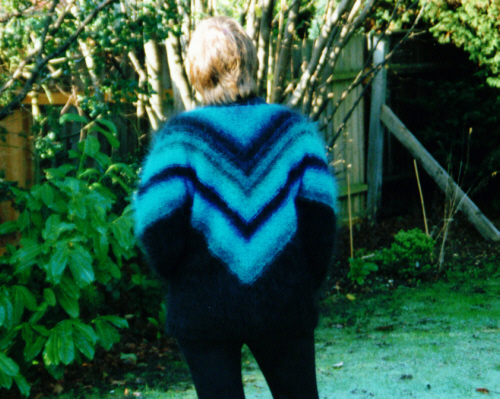
This sweater was made in a similar way to the cardigan above. The stripes need a little more planning for the part after it is divided for the sleeves.
The neck was left with a straight opening, giving enough room for it to go over a baby's head easily. The opening was finished by picking up a row of stitches and casting off again on the next row. The hem and sleeves were finished in the same way.
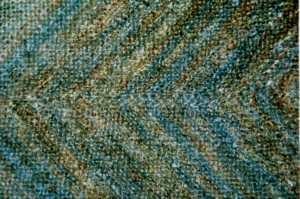
These centre-
This is also a good way to use yarn from different dye lots as the shading effect is distributed equally around the garment.
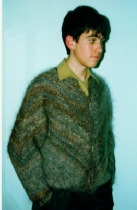
I did not have enough of the main yarn and intended to finish with a yarn that was similar but appeared to be more grey and less brown. I introduced a few rows of this contrast yarn into the main yarn, to spread the effect. I retained some of the main yarn to complete all the bands and cuffs.
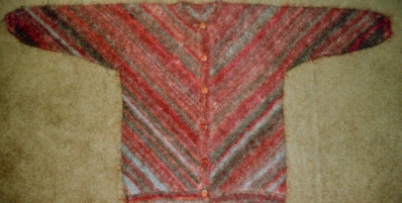
There was not enough of the variegated orange yarn to make the length of jacket I wanted so I added small amounts of brown throughout.
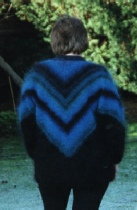
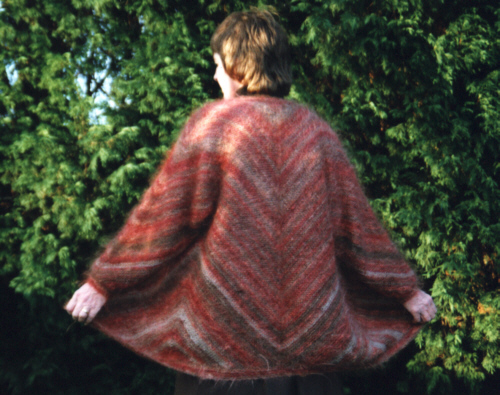
The photographs above show two different jackets.
I first made the jacket modelled using a variegated mohair yarn down to the point where it divides for the sleeves and completing with plain black.
I was asked to make another but could not get enough of the same yarn so bought it in a different colourway. The brighter blue was common to both colourways so they blended together so it was not obvious they were not the same.
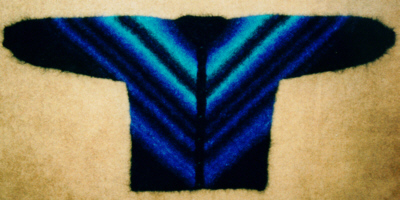
Another version.
See Second Thoughts Pages 20 -